Here it is now, the last advent calendar blog post for 2024. Which also means, that many of you are celebrating Christmas today or tomorrow. So why do you read blog posts on such a day? 😁
The last topic for this edition will be about another HTML element you might not have known before. But you all know and hate cookie popups, right? Well, unless you are into the development of such tools. 😅
The dialog HTML element
When we “want” to create a popup, we would have used some kind of “modal library” in the past. But now, we have a native HTML element for this: the <dialog> element. It has some similarities with details element, I have blogged about four days ago. And if you visited the resources I’ve linked there, you might already have seen the element. This is how you would use it:
<dialog>
	Some Text inside the dialog.
</dialog>
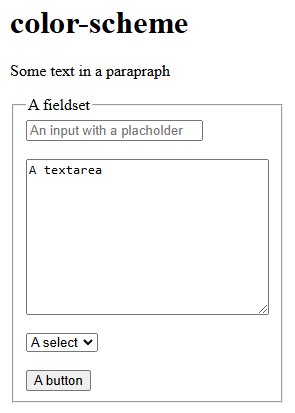
If you put this code into your page, you would see … absolutely nothing. The element is not visible by default. You can add the open attribute to it, just as with the details element and then you would see this:
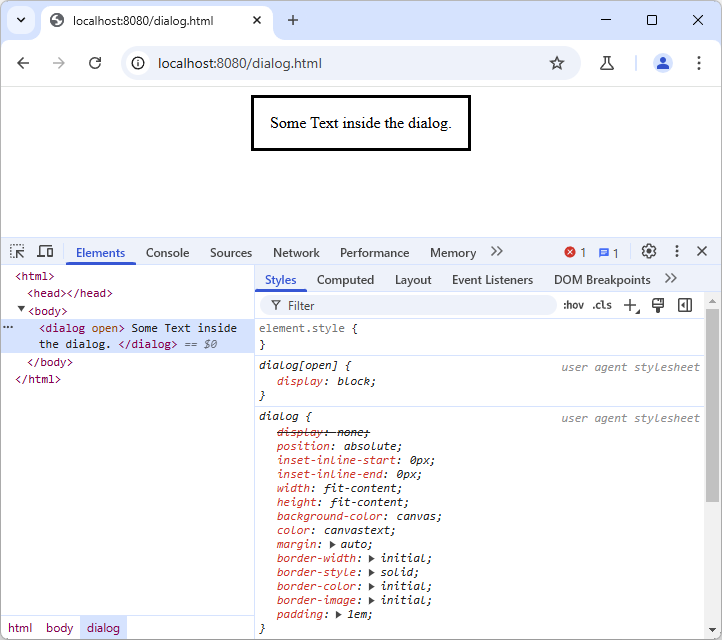
As you can see here, we get more than just a blank element with some text. The dialog has a border, some padding and is centered on the page, using an absolute position and auto margin. This would even mean, that it is displayed above any content that comes after it.
Opening and closing the dialog
A dialog that open by default is not really all that useful. Fortunately, we have some JavaScript functions to make it interactive. So let’s add a button that would open the dialog and a button inside of it, to close it:
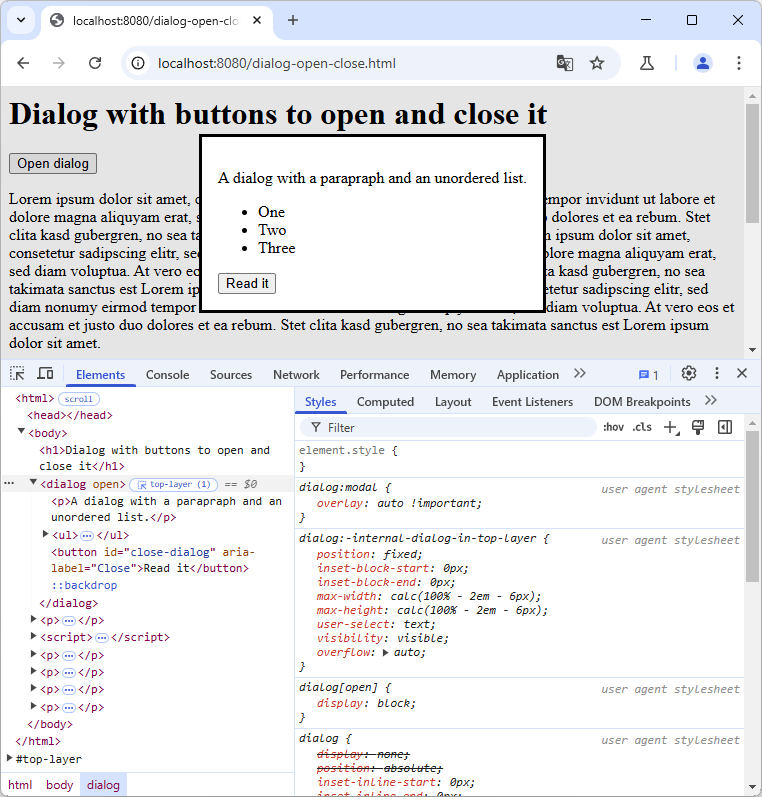
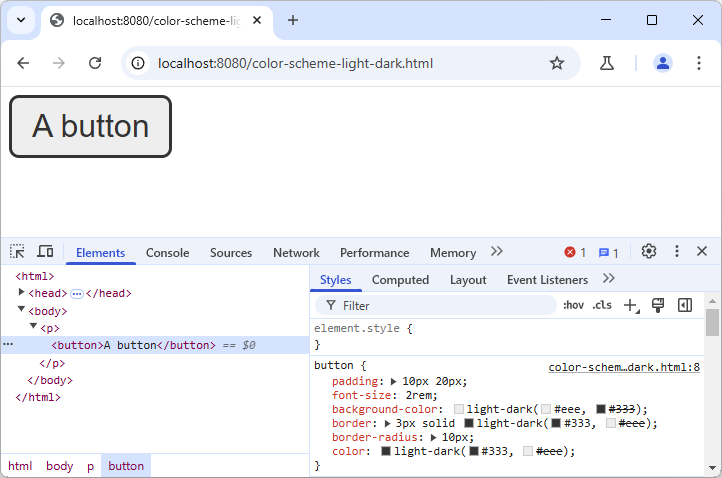
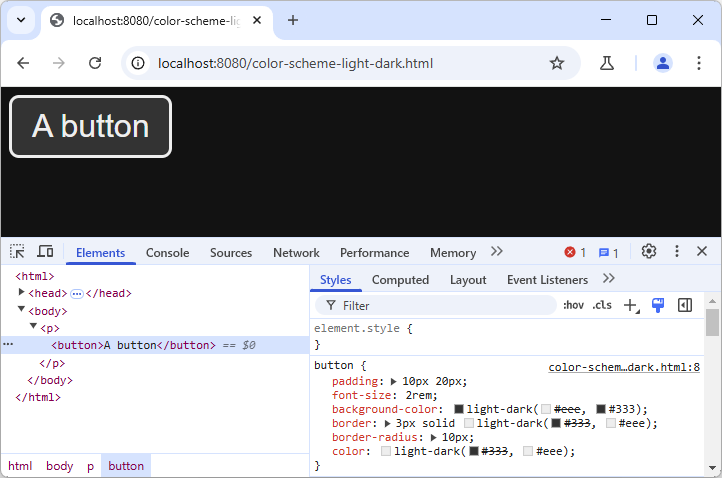
This screenshot shown multiple things at once. First, we have the webpage with an “Open dialog” button. When clicked, it will open the dialog, which has some more HTML content this time. You may also notice, that the background of the website is gray. It is white, but when the dialog is open, there will be an overlay to the page. This can also be seen in the left with the ::backdrop pseudo-element. One last thing to recognize is the #top-layer after the HTML tree on the left. This is a special layer that covers the entire page and helps with accessibility.
When you close on the “Read it” button, the dialog will close. For the two buttons, we need some JavaScript to add this functionality:
const dialog = document.querySelector('dialog');
const openButton = document.querySelector('button#open-dialog');
const closeButton = document.querySelector('button#close-dialog');
openButton.addEventListener('click', () => {
	dialog.showModal();
});
closeButton.addEventListener('click', () => {
	dialog.close();
})
When you use the showModal() function, it does not really matter where the element is placed in the HTML tree. It will always open in the center of the page. If the content does not fit, a scrollbar will appear.
Alternative way to open the dialog
There is a second function to open a dialog. It is simply called show() and would open the dialog “in place” and not as a modal. In this case, it makes a difference where the dialog is placed. It will still show it with “position: absolute” over the content, but not vertically centered anymore. It will appear just where its HTML is placed in the DOM. There will also be no backdrop overlay and no #top-layer, so the behavior has some major differences.
Closing the modal without JavaScript
To open the dialog, you either need some JavaScript with one of the two functions to “show” it. Unless you add the open attribute to it, to have it open by default – I really wonder why the functions are not openModal() and open(), then the element is also using the open attribute.
To close the dialog, however, you might not need JavaScript. You can also have it closing itself, when you have a form inside of it:
<dialog open>
	<form method="dialog">
		Some text in the dialog.
		<button>OK</button>
	</form>
</dialog>
Do you see the special trick with the form? It’s using the value dialog for the method attribute. This will close the dialog, whenever the form is submitted with a button inside of it. So you could even just have an input and it will close on ENTER.
If the dialog was opened with showModal(), this modal can also be closed with the ESC key. So there are different ways to close it without any JavaScript.
Styling the element
The dialog itself can be styled like any other “container”. As shown earlier, it comes with some default border and padding. More interesting is probably the styling of the backdrop. Here is an example styling both:
dialog {
	border-radius: 5px;
	border: 3px solid red;
	top: 30px;

	&::backdrop {
		background: black;
		opacity: 0.7;
	}
}
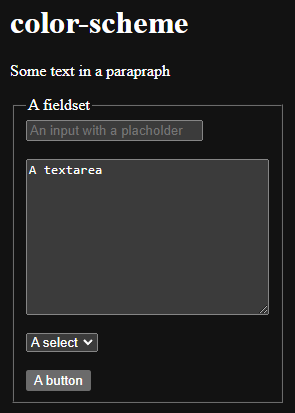
We are changing the border of the dialog and also change the background of the backdrop. Ah, and by the way, what you see here is no Sass syntax. This is native nested CSS. If you haven’t seen this before, read the previous advent calendar blog post “Nested CSS without preprocessors“. Finally, this is how it would look like:
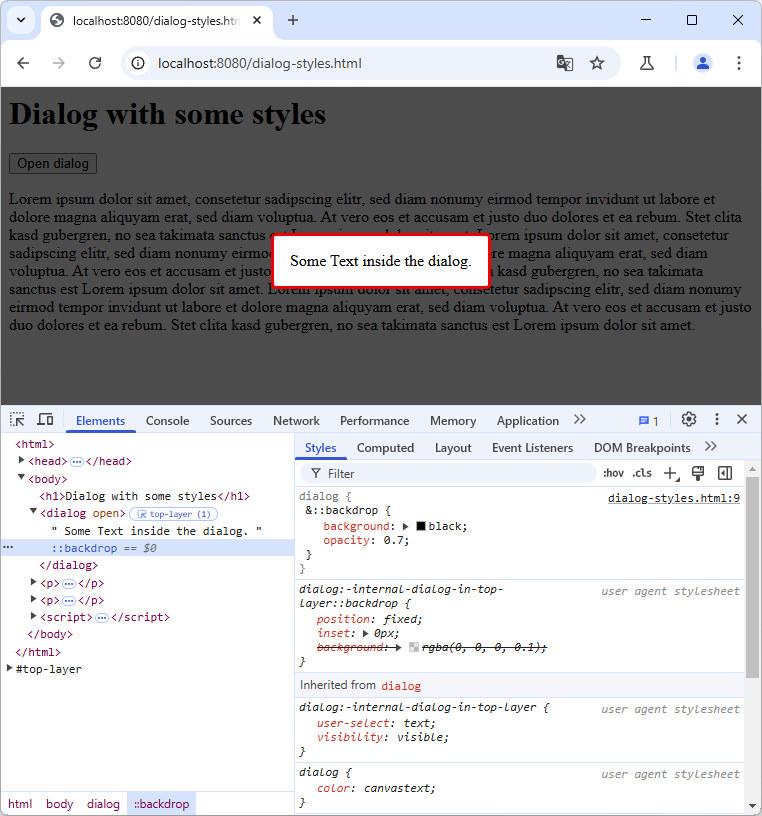
Instead of the rgba() value for the background we now use a background-color in combination with an opcatity.
Getting even more out of the element
On the documentation page, you will fine many more examples on how to use forms inside the element, style it, interact with it, etc. But all of that would be too much for this blog post. The CSS-Trick blog post that covers the details element, also has some examples for the dialog element.
Conclusion
I hope I have saved the best topic for today. At least I found this element really fascinating and used it in one project. I might blog about this use-case. But that’s something for next year. This was my final advent calendar blog post and also the last one for this year, keeping my two weeks routine on blogging.
I hope you’ve learned some new things in the advent calendar blog posts, or in the others I have written this year. It was fun, but also a lot more work than I thought it would be. Have some great few days and see you all in 2025! 🎇